Bonnet Correction Brief in Roodepoort
The client was a private vehicle owner in Roodepoort who wanted the bonnet to look sharper after washing marks, light oxidation and swirl marks had become easy to see on the dark paint. The brief was simple: reduce the defects as far as safely possible, improve the reflection in direct sun, and avoid thinning the clear coat more than needed. The bonnet had already been machine-washed a few times and the finish showed the usual mix of fine scratches, buffer trails from earlier work and some dullness around the centre section.
Because darker paint shows everything, we set expectations early. A correction job like this is not about making a panel look wet for five minutes, it is about getting the surface flatter and cleaner in a way that still keeps the paint healthy. We also checked the trim lines, edges and washer nozzle area, since those spots can burn through fast if a person gets heavy handed.
- Vehicle area treated: bonnet only
- Paint condition: swirl marks, light haze, wash marring and mild oxidation
- Finish goal: better gloss, improved clarity and reduced visible defects
- Location: Roodepoort, Gauteng
What We Supplied and Why It Mattered
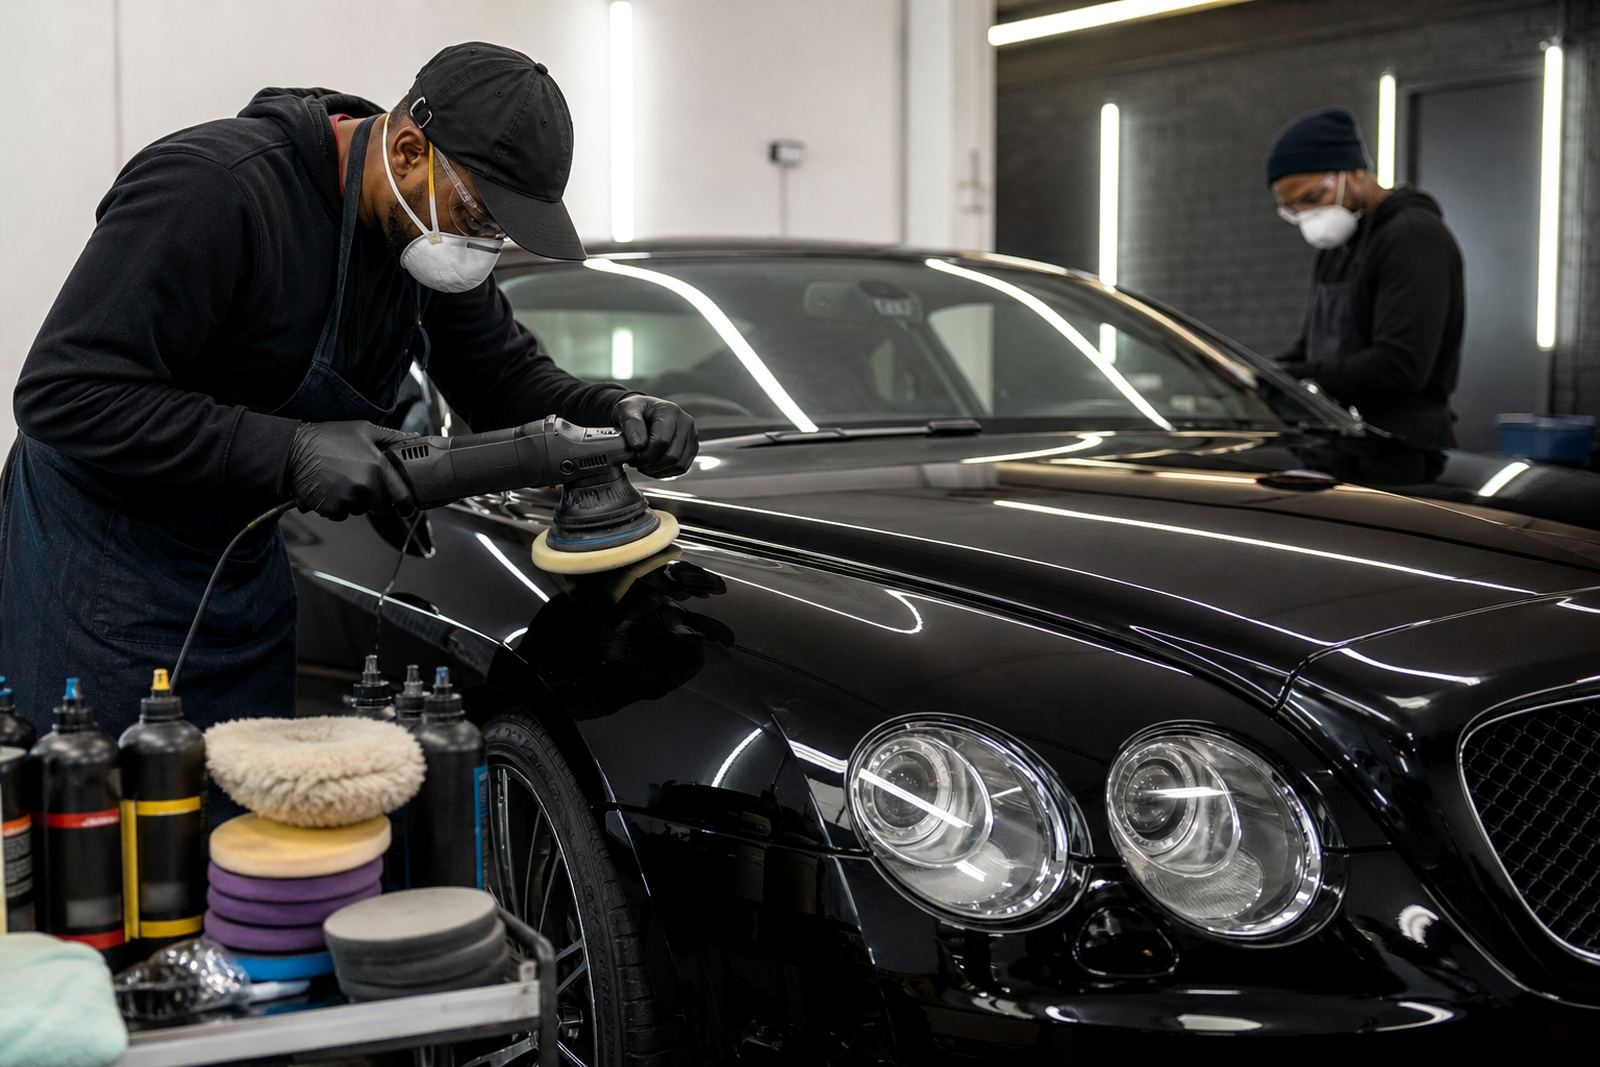
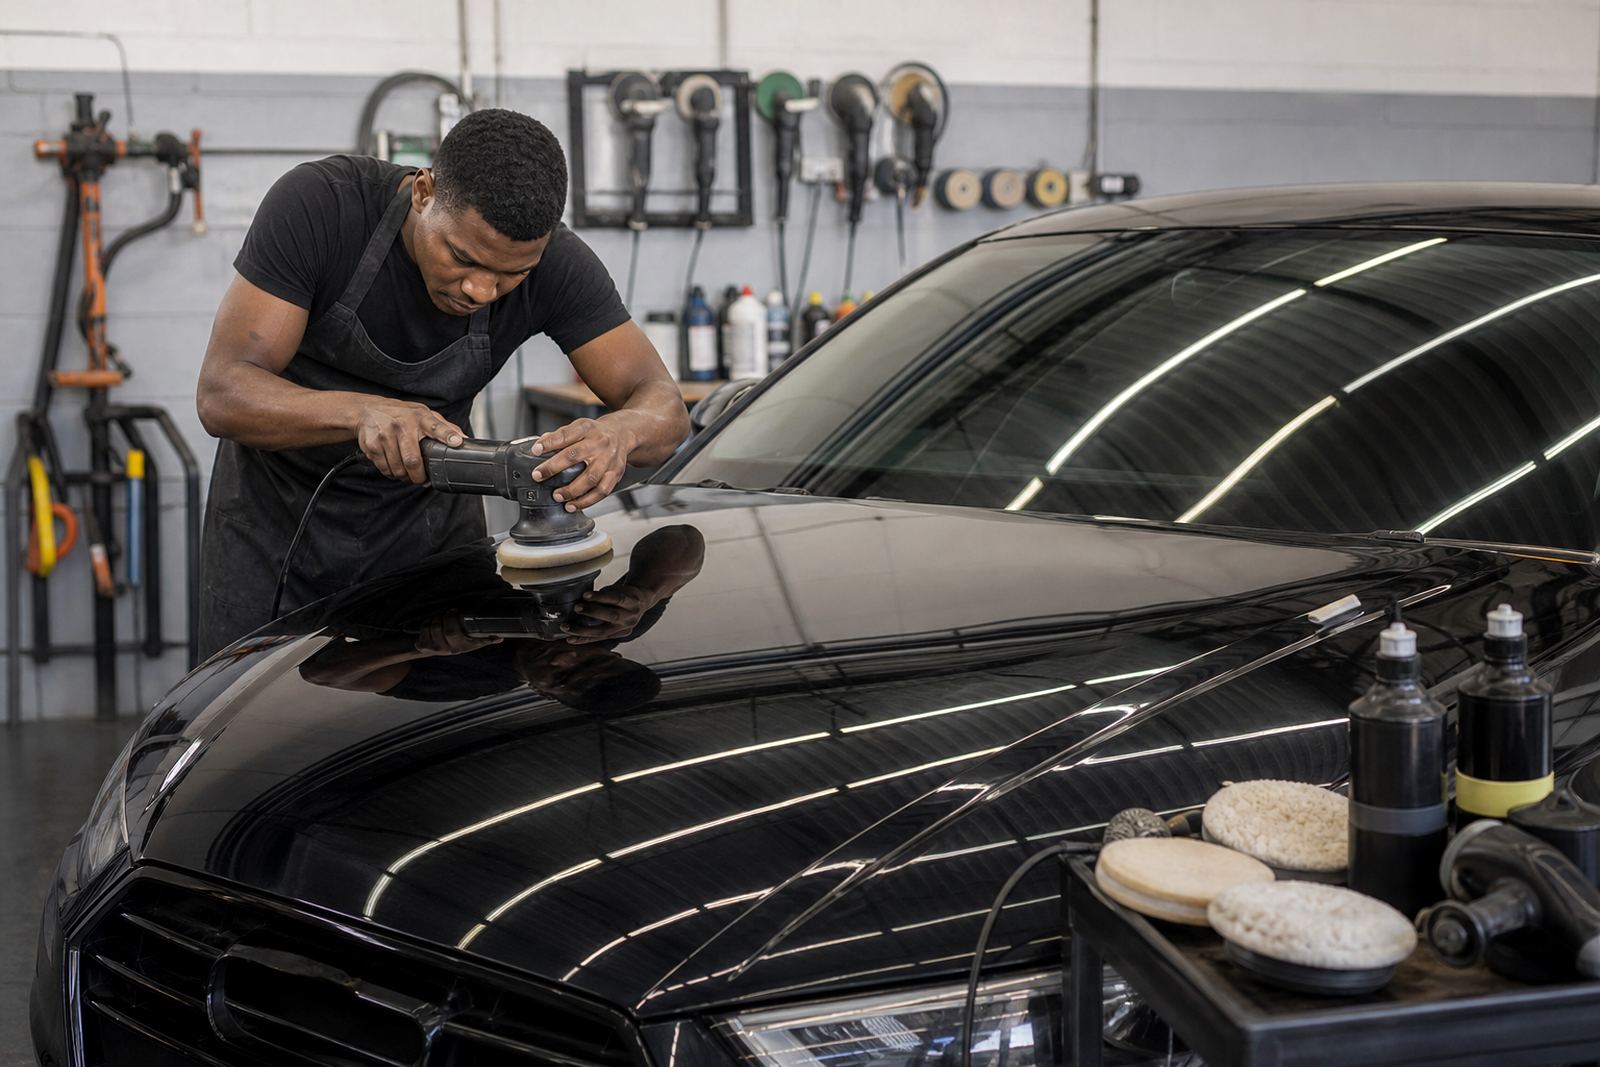
For this job we supplied a rotary polisher for the first refinement stage, then a dual-action polisher for the finishing pass. That mix gives control where it matters most. Rotary machines cut more quickly and are useful for heavier defect removal, while dual-action polishers are better for finishing and for reducing the risk of heat marks on softer sections.
We matched the pad and compound choice to the paint response rather than forcing one setup across the entire bonnet. A medium-cut compound on a foam cutting pad was used first, followed by a finer polish on a softer finishing pad. On darker paint, the last step is often where the difference shows most. The aim is to remove the oily smear and leave a crisp reflection, not just a shiny surface.
- Machine types used: rotary polisher and dual-action polisher
- Consumables used: cutting pad, finishing pad, medium-cut compound, fine finishing polish
- Protection used: masking tape for trim and edges
- Safety used: gloves, eye protection and a dust mask during prep and wipe-down
Technique Used on the Bonnet Surface
Before polishing, the bonnet was washed, decontaminated and dried so that loose grit would not get dragged across the panel. We inspected the paint under strong light, then taped off badges, rubber edges and any sharp panel lines. This matters because even a small amount of dust or dried residue can cause fresh micromarring during machine work. In Gauteng, with plenty of wind and dust around industrial and residential areas, that prep step is not optional.
The polishing itself was done in small sections, keeping pad movement steady and pressure controlled. We worked with moderate arm speed, overlapping passes and short inspection breaks. On the first pass we cut back the swirl pattern and light haze. On the second pass we refined the finish to bring out a cleaner, more even gloss. Heat was monitored carefully, especially around the bonnet edges. A panel can go from safe to too warm quicker than people expect, so we kept checking by hand between sections.
There was no point rushing the job. Dark paint will expose every error, and a bonnet is large enough that poor technique shows up in the final reflection. Slow, even passes gave us a better result and less risk of rework.
Timeline and Site Conditions
The work ran over one week from first inspection to final handover. Day one was assessment and product selection. Day two and three were the correction stages. Day four was the final finishing pass, followed by a last inspection in natural light. That schedule suited the client because the vehicle remained available for use between sessions and we could keep checking how the finish settled.
Roodepoort conditions played a part as well. Afternoon dust, changing light and the risk of quick rain meant we had to plan the work around weather and drying time. On a bonnet job like this, even a small amount of moisture left on the surface can affect the wipe-down, so timing mattered. The client also wanted the car back in service without long delays, which made a one-panel correction practical.
- Project duration: 1 week
- Work stages: inspection, prep, correction, finishing, final check
- Environment factors: dust, weather changes and bright daylight inspection
- Approach: staged work rather than a single aggressive session
Results on Dark Paintwork
The bonnet came back with a noticeably cleaner look and a stronger gloss level. Swirl marks were reduced, the paint had more depth in sunlight, and the surface reflections became clearer across the main viewing angles. The panel still showed that it had been driven and used, because that is normal, but the sharpness of the finish was much better than before. That is the real value of proper correction work.
The client also appreciated the practical side of the job. We explained how to wash the bonnet without putting the same marks back into the paint, including using clean wash media, a gentle drying method and a safer approach to machine drying around sharp dust on the surface. On darker vehicles, the owner’s washing routine matters just as much as the polish itself. If the routine is wrong, the finish starts going backwards quickly.
- Visible improvement: reduced swirls and haze
- Gloss level: lifted and more even across the bonnet
- Reflection quality: clearer in direct light and shade
- Aftercare: careful wash method and dry with clean microfibre towels
Bonnet Correction Notes
If we had to repeat this bonnet correction, we would follow the same process: inspect first, choose the least aggressive setup that can do the job, and finish with a clean refinement step. That approach protects the paint and gives a better long-term result than chasing every mark with heavy cut. We would also keep doing a proper safety briefing before machine work, because polishing throws fine residue into the air and that is not something to ignore.
For similar jobs in Johannesburg, Pretoria, Cape Town, Durban or Bloemfontein, the same method applies, but the exact pad and compound pairing should be matched to the paint hardness and the condition of the panel. A bonnet with hard clear coat can take a different setup from a softer finish, and a coastal vehicle in Durban may carry more grime and moisture issues than one in dry inland conditions. Good judgement matters more than a fast hand, otherwise you just chase your tail.
Polisher works from Germiston, Gauteng, supplying polishers, buffs, compounds and polishing training across South Africa. Our team, led by Mandla Sipho Dlamini, supports hobbyists and working workshops with starter kit advice, machine care, pad and compound matching, and practical training for metal and paint finishing.
Key facts
| Project | Roodepoort bonnet correction |
|---|---|
| Vehicle area | Bonnet only |
| Paint type | Dark automotive paintwork |
| Main issue | Swirls, haze and light oxidation |
| Method | Rotary correction followed by dual-action finishing |
| Duration | 1 week |
| Location | Roodepoort, Gauteng |